
Ladybug Cross Stitch Pattern: A Detailed Guide to Mother Bee Designs

4.5 out of 5
| Language | : | English |
| File size | : | 4078 KB |
| Text-to-Speech | : | Enabled |
| Screen Reader | : | Supported |
| Enhanced typesetting | : | Enabled |
| Print length | : | 8 pages |
| Lending | : | Enabled |
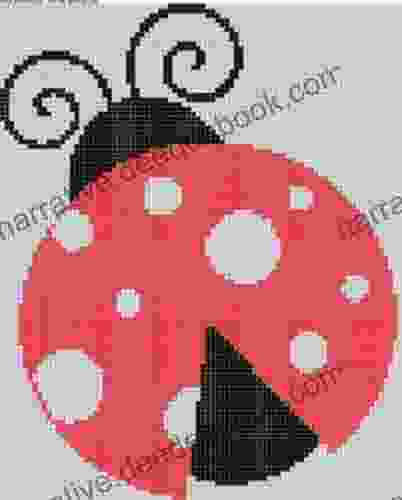
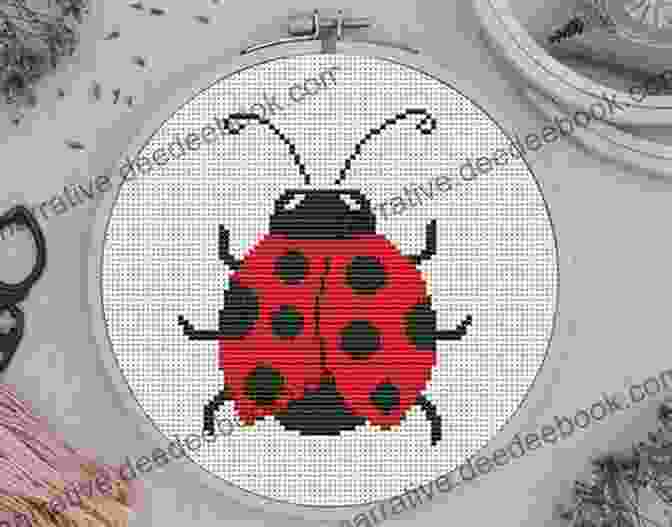
Welcome to the delightful world of cross stitch, where colorful threads intertwine to create intricate and captivating designs. In this comprehensive guide, we will embark on a journey to explore the exquisite Ladybug Cross Stitch Pattern by Mother Bee Designs. As we delve into the detailed charts and instructions, you will discover the secrets to stitching a vibrant and charming ladybug that will add a touch of nature's beauty to your home or wardrobe.
Materials You'll Need
Before we dive into the stitching process, let's gather the essential materials you'll need:
- White Aida fabric (14-count): This fabric provides an ideal grid for precise cross stitches.
- DMC embroidery floss: In various shades of red, black, white, and gray for the ladybug's body and details.
- Embroidery needle: Size 24 or 26 works well for 14-count Aida fabric.
- Embroidery hoop: To keep your fabric taut while stitching.
- Scissors: To trim the excess floss.
- Pattern printout: The Ladybug Cross Stitch Pattern by Mother Bee Designs.
Understanding the Pattern
The Ladybug Cross Stitch Pattern consists of a grid with each square representing a cross stitch. The colors and symbols on the grid correspond to the DMC floss colors you'll use. To make it easier to follow, the pattern includes a color key that lists the floss colors and their corresponding symbols.
Getting Started
1. Prepare the fabric: Cut a piece of Aida fabric large enough to fit the pattern with a few inches of extra space on all sides. Center the fabric in the embroidery hoop and tighten the screw to hold it securely.
2. Start stitching: Choose the starting point indicated on the pattern and thread your needle with the corresponding floss color. Follow the pattern, stitching one cross stitch at a time. Each cross stitch consists of two diagonal stitches that form an "X" shape.
3. Complete the outline: Begin by stitching the outline of the ladybug's body, using black floss for the head and red floss for the body.
4. Fill in the details: Once the outline is complete, fill in the details of the ladybug's body, such as the spots and stripes. Use different shades of red to create a realistic effect.
Variations and Embellishments
The Ladybug Cross Stitch Pattern offers ample opportunities for creativity and personalization. Here are some variations and embellishments you can try:
- Change the colors: Experiment with different colors for the ladybug's body and spots, such as orange, yellow, or pink.
- Add beads or sequins: Enhance the ladybug's appearance by adding small beads or sequins to its body or antennae.
- Create a scene: Stitch the ladybug on a background of flowers, leaves, or other natural elements to create a charming vignette.
- Use different stitches: Combine cross stitch with other embroidery stitches, such as backstitch or French knots, to add texture and dimension to the design.
Finishing Touches
Once you have completed stitching the ladybug, it's time to give it a professional finish:
1. BackStitch: Stitch a row of backstitches around the edges of the ladybug to secure the stitches and give it a polished look.
2. Trim excess fabric: Trim the excess Aida fabric close to the edges of the stitching.
3. Wash and iron: Gently hand-wash the cross stitch in cold water and let it air dry. Iron it on low heat to remove any wrinkles.
Display Your Masterpiece
Now that your Ladybug Cross Stitch is complete, it's time to showcase it with pride:
- Frame it: Place the cross stitch in an embroidery hoop or frame to protect it and display it as a decorative piece.
- Make it into a pillow: Stitch a backing onto the cross stitch and insert it into a pillowcase for a cozy and personalized touch.
- Use it as a wall hanging: Attach a ribbon or cord to the top of the cross stitch and hang it on a wall for a charming and eye-catching display.
The Ladybug Cross Stitch Pattern by Mother Bee Designs is a delightful and rewarding project that will bring you hours of creative joy. Whether you choose to stitch it as is or explore your own creative variations, this guide has provided you with the knowledge and inspiration to create a stunning ladybug masterpiece. Embrace the intricate beauty of cross stitch and embark on a journey of creativity that will fill your home and heart with joy.
4.5 out of 5
| Language | : | English |
| File size | : | 4078 KB |
| Text-to-Speech | : | Enabled |
| Screen Reader | : | Supported |
| Enhanced typesetting | : | Enabled |
| Print length | : | 8 pages |
| Lending | : | Enabled |
Do you want to contribute by writing guest posts on this blog?
Please contact us and send us a resume of previous articles that you have written.
 Book
Book Page
Page Story
Story Library
 Paperback
 Paragraph
 Bookmark
 Shelf
Shelf Glossary
 Bibliography
 Foreword
 Preface
 Footnote
 Codex
Codex Tome
Tome Library card
 Narrative
 Biography
 Memoir
 Reference
 Narrator
 Resolution
 Catalog
 Borrowing
 Stacks
 Archives
 Periodicals
 Study
Study Scholarly
 Lending
 Reserve
 Academic
 Journals
 Rare Books
 Interlibrary
 Literacy
 Study Group
 Storytelling
 Awards
 Textbooks
 Douglas Wight
 Monica Wellington
 Robert Iannone
 David Devoy
 Roland Dannreuther
 Aleta Medea
 Bethany Olds
 Toney Allman
 Alicja Urbanowicz
 Anthea Peries
 Gallagher Lawson
 Ian Pryor
 Rafaela Hillerbrand
 Ralph P Lester
 Eric Macintosh
 Kayla Brissi
 Neil Fabricant
 Lay Hwee Yeo
 Melissa F Miller
 Alberto Alemanno
Light bulbAdvertise smarter! Our strategic ad space ensures maximum exposure. Reserve your spot today!


 William GoldingThe Ultimate Guide to Spa Escapes and Breaks in England and One or Two in...
 Banana YoshimotoCleo's Incredible Journey Through Feline Diabetes To Remission: A Tail of...
 Hamilton BellFollow ·16.9k
 Cole PowellFollow ·17k
 Dan BellFollow ·5.5k
 Joe SimmonsFollow ·4.4k
 Rex HayesFollow ·8.8k
 Greg CoxFollow ·18.1k
 Giovanni MitchellFollow ·4.6k
 Derek CookFollow ·3.8k

 Dallas Turner
Parasols and Peril: Adventures in Grace
In the quaint town...

 Caleb Carter
Flight Attendant Joe: A Dedicated Professional in the...
Flight Attendant Joe...

 Jerry Ward
Pick Lottery The List For 23 States August 15 2024
The Pick Lottery is a multi-state lottery...
 Hudson Hayes
How the Media Wields Dangerous Words to Divide a Nation
In a world where the media is...
 Curtis Stewart
The Magic Mala: A Story That Changes Lives
In the realm of ancient traditions and...

 Raymond Parker
Earthly Meditations: A Poetic Tapestry of Nature,...
In the realm of contemporary...
4.5 out of 5
| Language | : | English |
| File size | : | 4078 KB |
| Text-to-Speech | : | Enabled |
| Screen Reader | : | Supported |
| Enhanced typesetting | : | Enabled |
| Print length | : | 8 pages |
| Lending | : | Enabled |
